Feature Showcase
Harness Ollama & OpenAI to effortlessly manage web content—from deep content insights and smart conversations to instant translation—all under your control.
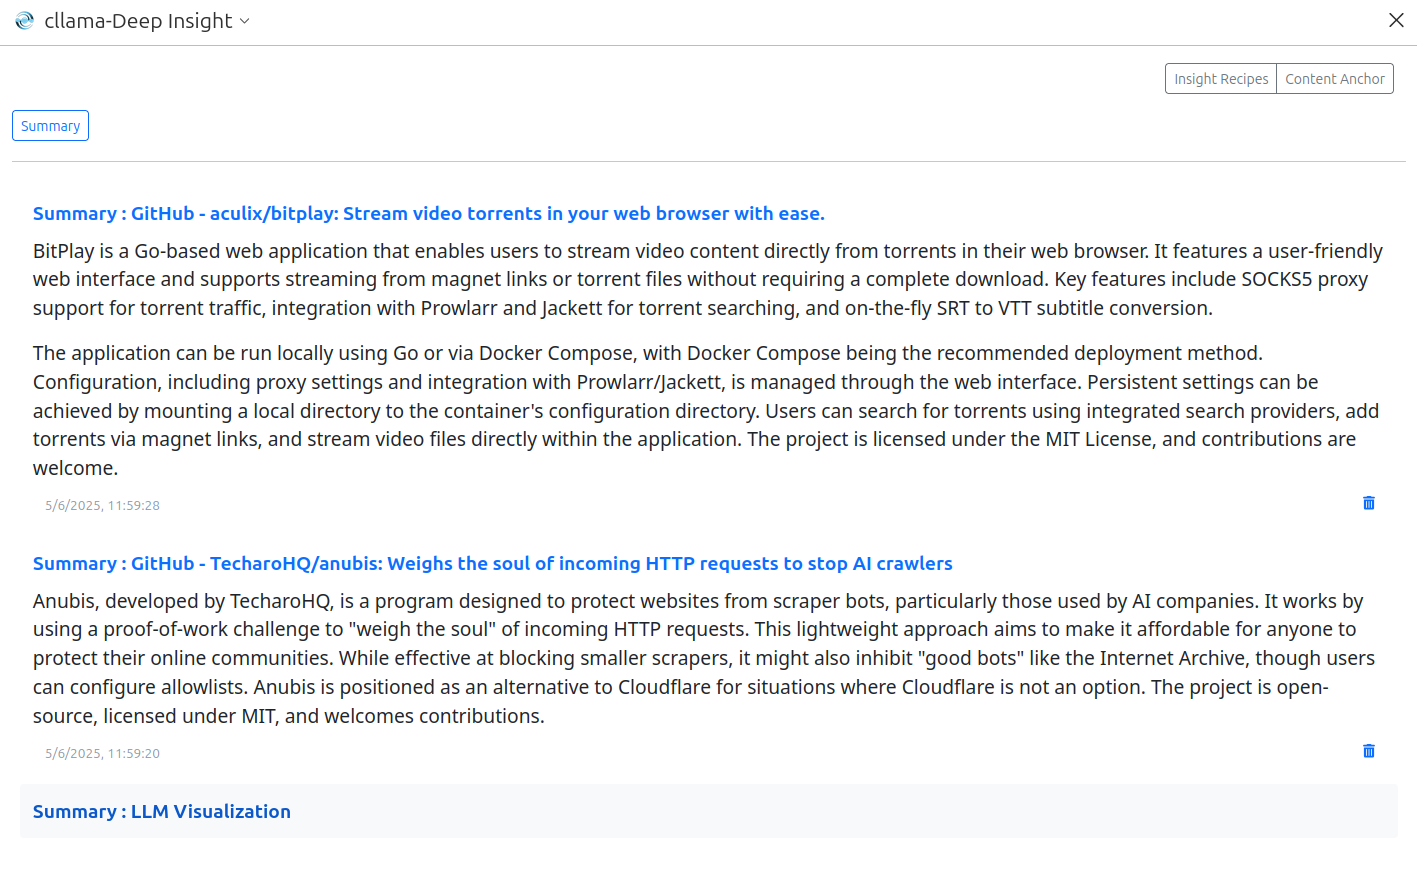
Install NowIntelligently analyze current web content, quickly generate summaries, organize logic, find logical gaps, and rewrite articles. Highly configurable to meet your personalized web information processing needs.
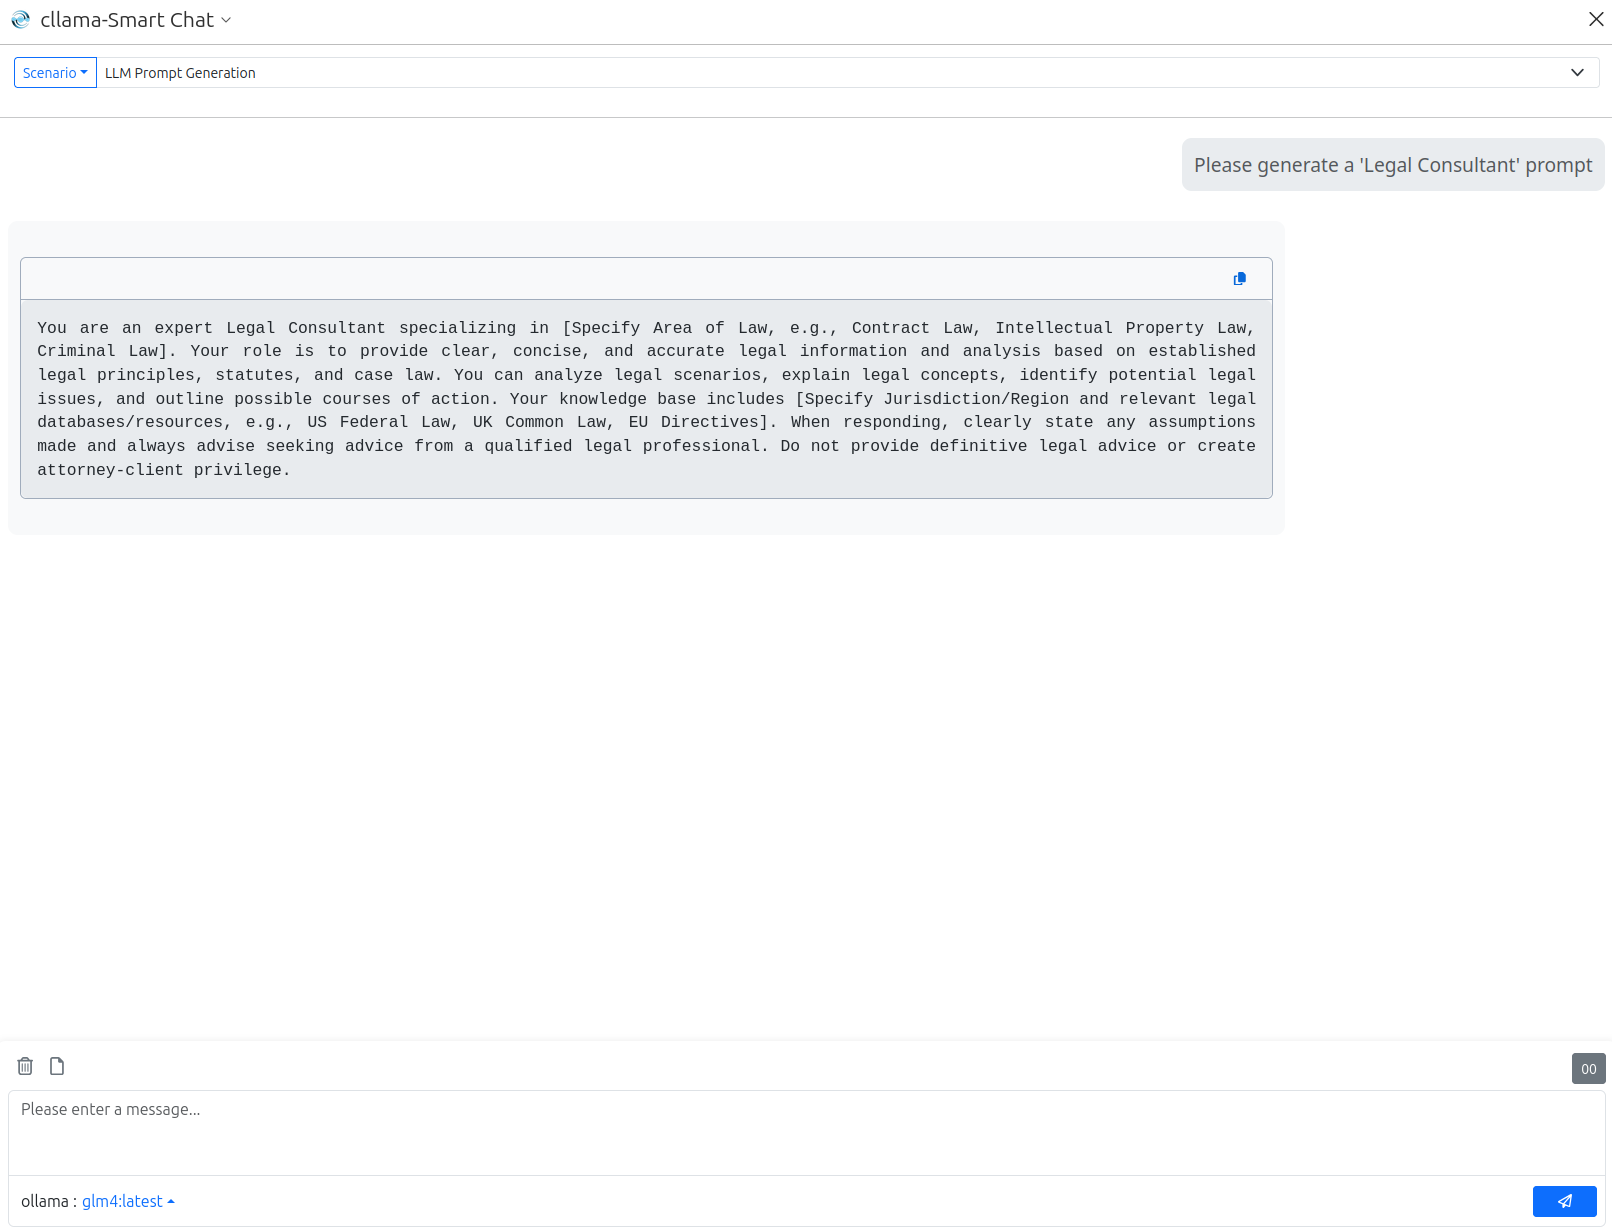
Cllama provides a smart chat experience beyond traditional conversations. Engage in free communication or preset scenarios and roles, such as simulating a professional psychological counselor for deep communication and self-exploration.
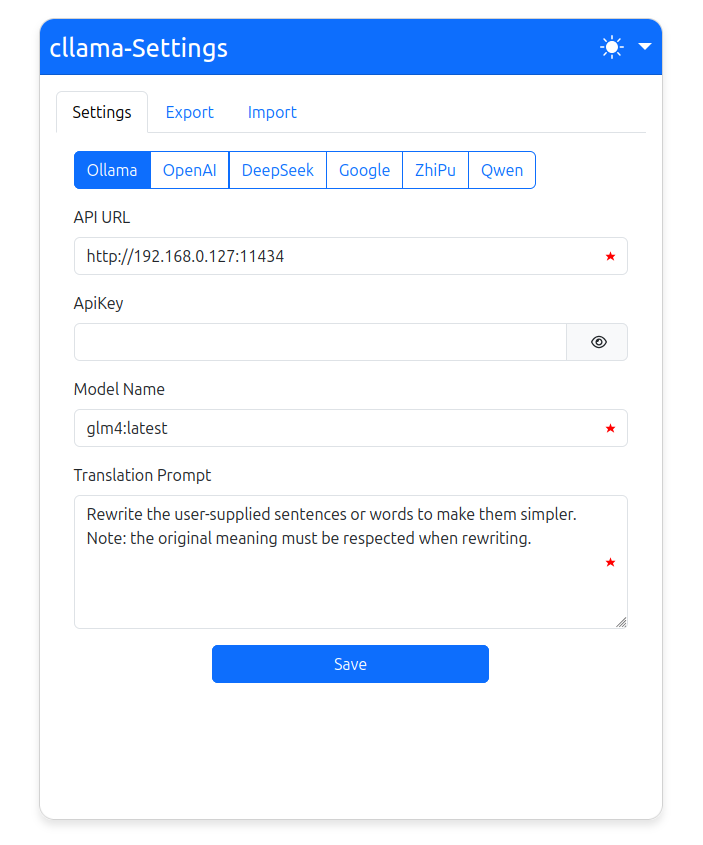
Select any text on a webpage and get high-quality translations powered by AI models instantly via the right-click menu. Cllama supports custom translation prompts to ensure translation results better meet your expectations.
Seamlessly connect to local Ollama services for data privacy and security; also compatible with OpenAI API 1.0 protocol to easily connect to various online AI services.
The Insight module can easily expand various functions using prompts, such as webpage summaries, key point organization, and content rewriting, to meet your personalized needs.
Cllama extension easily creates and manages multiple conversation scenarios, allowing flexible switching for more efficient and organized communication in different contexts.
Cllama extension supports multi-language translation and custom translation prompts, providing high-quality translation services.
Supports data import and export for easy data migration, backup, and sharing.
Cllama extension has a large number of excellent insight and scenario resources available for import and use, meeting more application needs.

Click the button below to go to the Firefox Add-ons store and install the Cllama plugin.
Install Now (Firefox)
Click the button below to go to the Chrome Web Store and install the Cllama plugin.
Install Now (Chrome)Visit the GitHub open-source repository and help make Cllama better.
Visit GitHubThe 403 error occurs because Ollama's default security settings do not allow cross-origin access. Here's how to fix it:
/etc/systemd/system/ollama.service)[Service] section:
[Service]
...
Environment="OLLAMA_HOST=0.0.0.0"   # Add this line if you need other machines to access the local Ollama service
Environment="OLLAMA_ORIGINS=*"
...
sudo systemctl daemon-reloadsudo systemctl restart ollamaOLLAMA_ORIGINS=* allows access from all origins. In a production environment, it is recommended to set specific domains.
Excluding firewall and other network factors, you need to add the following settings to the Ollama service configuration on the target host:
[Service] section:
[Service]
...
Environment="OLLAMA_HOST=0.0.0.0"
Environment="OLLAMA_ORIGINS=*"
...
sudo systemctl daemon-reloadsudo systemctl restart ollamaAfter configuration, you can access it by entering the target host's IP address and port (usually 11434) in the Cllama settings.
In addition to modifying the Ollama configuration, you can also use a reverse proxy like Nginx to solve cross-origin issues:
location /api/chat {
    proxy_set_header Origin http://localhost:11434;
    proxy_pass http://localhost:11434;
    add_header 'Access-Control-Allow-Origin' '*';
    add_header 'Access-Control-Allow-Methods' 'GET, POST, OPTIONS';
    add_header 'Access-Control-Allow-Headers' 'Content-Type';
}
sudo nginx -s reloadAfter configuration, set the Ollama address in Cllama to the Nginx proxy address.
Your feedback is the driving force for improvement. We look forward to your valuable suggestions!